Archive 17/01/2023.

RPG game prototype

Lumak

It’s very late for me right now but I’ve been excited about my RPG game prototype. And yes, the hovercraft is part of the game.

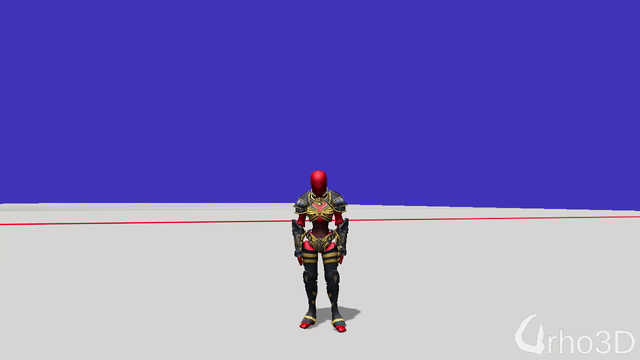
First proof of concept is skinned armor then onto melee combat.

Image: took me a while to modify, reduce the polycount on the X-bot model, and strip down the Maria model. Hopefully I can skin the armor and equip it in game in a day or two.

johnnycable

How do you “reduce the polycount?” decimate x2 / subdivide-retopo?
Normal maps?
Both?
I’d like to do the same, but I want to use Miku miku dance format, not supported by urho. So I need to write a custom importer first, then go onto reduce/retopo…

Lumak

I invested in Maya LT when Amazon had it on sale last year, so there’s no decimate but reduce mesh command. For this model, unlike Beta lowpoly that I’ve been using, I separated the mesh into individual piecesl then specified the triangle count for reduction and actually swapped out sphere joints and stomach with lower res meshes. It turned out nicer and tri count at 8k.

For normal map, I use NormalMapGenerator, https://github.com/Theverat/NormalmapGenerator

Lumak

Well damn, I thought it was going to be a challenge and would take a day or two to attach skinned armor onto another model, but I was wrong. In just few minutes:

Modanung

Did you simply add StaticModels to the bone nodes?
No, I see some deformations. In that case you could play around with the weights to give the breastplate a more solid feel.
But yea, nice minutes! It probably would have taken longer to get into an actual set of armor. :slight_smile:

Lumak

Model class already has functions that you need to do this.
Here’s my code snippet:

    Model *model = cache->GetResource<Model>("GameProto/Girlbot/Girlbot.mdl");
    Model *modelArmor = cache->GetResource<Model>("GameProto/Girlbot/GirlbotArmor.mdl");

// then simply call
   model->SetGeometry(4, 0, modelArmor->GetGeometry(0, 0));

My 1st pass of skinning is whatever the operation sets it to and I tweak it from there (if I even like the model). What you see is the 1st pass.

johnnycable

So this is the way for skinning a model. I don’t remember, is there an example for that?
In short, you have to create a separate mdl for everything’s added on… wearings, weapons, and so on…
Moreover, have you tried Awesome Bump?

Alex-Doc

Looking good!
My method for skinning is to make the armor/dress directly over the main 3D model with the same origin as the main model, I then set the skeleton/bone weights on the armor/dress accordingly to how I want them to be influenced and then in Urho3D I mount them as AnimatedModel on the same node of the main model.

I’m not sure if mine it’s a good idea tough, especially in case of high poly meshes and wanting to hide what’s underneath the armor.

@johnnycable I think it’s explained in combined skinned model: on this page

Lumak

In the true sense of RPG games where you can swap out armor pieces at runtime is what I’m after, hence, my code. But I wasn’t aware about the doc that Alex-Doc mentioned. That method looks as though you mount the entire set, unless you make your armor pieces as individual mdl files.

And I havent tried Awesome Bump. Thx for the link, I’ll give it a try.

Ya, that’s the best method that I found to skin the armor.

edit: I’ll have to experiment with the armor skinning and mouting a bit more. The Urho3D’s suggested method seems more simple and direct than calling SetGeometry(). I’ll need to evaluate whether I want to generate separate mdl for each piece.

johnnycable

@Alex-Doc yes, thanks for the link. I’ve already read it but, as usual, I’ve forgotten… :blush:
@Lumak Awesome Bump looks like a powered-up version of normal map generator you posted…
I think it’s possible to not having separated models for attachment probably, by having different animation streams in a composite, one per action… but not sure about it.

Lumak

OK, so I started exporting each piece of the armor as separate mdl file and it occurred to me that if I add them as AnimatedModel, then I would also have to animate them with the same animation as the character animation. Think for a minute about if I had five armor pieces added as AnimatedModels, and imagine this for x number of characters you have in the game.

I think I’ll stick to my method of just adding geometry to the base character and not worry about articulating the armor pieces.

Maybe, but I’m against the idea of having to specifically animate armor pieces.

Alex-Doc

In my case, I solved by modelling the armatures directly on the model, which is simple but as downside, requires pretty strict standardization of the models(or restrict this method to dresses).

For the non-moving parts such as the helmet and plates, I’m opting for static models on a specific mount node: imagine you have to mount a shield on the wrist, you add a bone called wrist_mount which follows the animation, add then a “shield” node. the static model(shield model) will be a component of this last.

Lumak

Does this mean that the character and armor/attachments are exported to a single mdl file and static in game, meaning that you cant remove the armor and/or swap pieces out?

And yes, it’d make sense to add static (non-skinned geom) to nodes.

Alex-Doc

No, I just use the same skeleton for the pieces, for instance, the gloves come in pair(one mdl for left and right) and in the 3D modeling program, share the same origin and armature/skeleton of the main (character) model.

To recap:
Blender file hierarchy looks like this

  • Armature
    – Character (naked)
    – Gloves

Armature has bones “hand.Right” and “hand.Left” which weights are mapped to both Gloves and to Character’s hands vertices.

When I export the model I will find Gloves.mdl and Character.mdl.

I’m sorry I’ve been confusing, I’m not currently at home, I will post a couple screenshots as soon as I get back (about 15 hours since this post).

Lumak

Yeah, that’s what I thought from reading your 1st post but the “strict standardization” kinda threw me off, but ya provide pics.

Alex-Doc

The screen-shots I’ve promised can be found Here.
As you can see, each part is on a different object and they are sharing the same skeleton.

Those will be used as templates to build the other equipment.
The standardization comes from the fact that using this method implies the limitation of having:

  • Same base model (and care with weights, so bone scaling will affect the armor correctly).
  • Won’t be able to hide what’s below the armature.
  • Have to be very careful to skin it correctly to avoid compenetration.
  • Possibly z-fight(?)

I’m pretty sure that each method has its downsides and doesn’t exists a “correct way” to do that, but only a “works best for me” way.

I didn’t made a screen-shot for the “Mount bones” as it is pretty straightforward as they are just placeholders for the transform.

I hope it will be useful, looking forward to hearing what’s working best for you!

slapin

No, as long as you add all your AnimatedComponents to single node, you just need to animate first one,
and that will make all of them animate.

slapin

I don’t see Z-fight in the setup I use (probably occlusion is more intelligent than I thought) but there is visibility problem
in some cases. People suggest using special textures, as engine doesn’t support vertex-masking.

and that is getting closer to my setup, I hope @Lumak will eventually get to the same bone problems as me
(and that would probably make it easier to solve them).

Lumak

You’re absolutely right because node only needs a single AnimationController component - can’t believe I missed this. While this is true, I’m still going to go with my method of adding geom to the base char to reduce all the bone matrix multiplications that happens in animatedModel.

I think our methods are the same - I place the armor on top of the char (as seen in the 1st post image) and skin it on the same skeleton then export just the armor with the skeleton. And yeah, I look for any areas where char’s body protrudes out from the armor and correct them by simply pulling verts away from the char’s body.

slapin

I think our methods are the same - I place the armor on top of the char (as seen in the 1st post image) and skin it on the same skeleton then export just the armor with the skeleton. And yeah, I look for any areas where char’s body protrudes out from the armor and correct them by simply pulling verts away from the char’s body.

How do you do this - in Urho or during modelling?

slapin

Also, with geometry method - how do you handle materials?

Lumak

1 - modeling
2 -

bool StaticModel::SetMaterial(unsigned index, Material* material);
slapin

i.e. you just GetMaterial/SetMaterial together with GetGeometry/SetGeometry, right?

Lumak

I call SetMaterial() for geoms added to the base char.

Lumak

Update - amor and melee combat. Created a repo for what’s shown in the gif.

yushli1

Thanks for sharing the source code. I learned a lot from all your projects.

Modanung

Which can be found here.

yushli1

Thanks!
How do you do the sword trails effect? I will try to look into the code but a little hint would be appreciated. :grin:

johnnycable

Probably 44_RibbonTrailDemo

Modanung

I think the seeming motion blur is the result of merging frames to attain a smaller gif.

weitjong

I think so too. Incidentally the person who contributed the RibbonTrailDemo has also shared his work for the motion blur shader in the past. Too bad the links to the screenshots in that post are all dead now.

https://discourse.urho3d.io/t/motion-blur/438

slapin

wheesh effect is needed… or is it called motion blur? I don’t really sure, but that is one which is used in JRPGs
when swords are used. Also some satisfying impact feedback is needed (camera shake?). That would make this extremely cool…

Modanung

I’m wondering how setting geometries work with LODs… I’m guessing these are kept and switched per geometry, then?

Lumak

I’ve not done any other testing by adding armor as geometries. If you discover anything odd, I’d like you to share that info on this thread.

There’s one odd behavior that I’m seeing with the layered anim affecting the base anim. I’ll post updates when I have something.

Alex-Doc

Please keep us posted about this:
I’ve experienced a similar issue in the past and thought it was my fault.

Lumak

I discovered that in my sheath/unshead layer animation the “Hips” joint’s rotation z was something like -3e-16 and the assetimporter picked that up as having a track animation. I corrected it by setting it to 0 and both animations have been replaced in the repo.

Lumak

Same issue with the “Spine” joint and replaced both animations again. The actual rotation value for hips and spine was 3.14e-5 not the other number that I mentioned previously.

Lumak

Added a frame in slashcombo3 which will allow collision to be detected more easily. Before the change, it’d take 1 frame for the blade to go from left of the body to the right. Adding a frame directly in the center should resolve the collision detection issue.

Modanung

Or a ConvexCast?

Lumak

Absolutely not. Sword already has a collision box and there’s no need add additional checks to validate collision detection.

The error is in the animation data. See the pic below.
Doing a bit of math before the additional frame is added:

sword travel distance from frame A to B, radius @ 1.2 = 3.768 m
sword swing rate at 1/30th of frame = 3.768 * 30 = 113.040 m/s
bullets conversion of m/s to kmh = 3.6
sword speed = 113.04 * 3.6 = 413.7 kmh

Not even professional baseball players can swing their bat that fast.

For everyone making melee animation, I’d suggest number of frames from A to B should be about 3 or 4. I changed slashcombo3 to 2 yesterday but it should be increased.

coldev

Lumak … You are the man…
:grin:

Lumak

I never know if I should reply to comments like this and the reason I hadn’t replied, but I like to get a reply on my comments. So, I’m glad you like it!